Looking to do add a garage onto your home but don’t want to drop a lot of cash? What if we told you there’s an affordable solution that can cost much less. Shipping containers are a trendy, Eco-conscious way to add more room on to your home without breaking your budget. There are tons of things you can build with shipping containers, but we’re going to focus on one area of your home — the garage.
Building your dream garage doesn’t have to be difficult — or expensive. It’s easy when you follow our –
Top 7 steps to creating an incredible shipping container and storage garage
1. Choose Your Container Size
Some of the largest cargo ships are built to hold up to 20 million containers. It’s safe to say your container choices are far more diverse than you think. The space you have available is going to affect the size of the container you’re going to get. You’ll have to consider the size and number of vehicles you want to store, too. Regarding size, standard containers are often 20 or 40 ft. Beyond that, you can find containers as big as 45 ft and as small as 10 ft.
Got a big SUV or roof racks on top of your car ? Look for a taller shipping container.
2. Choose Your Container Type
Container size is determined by the size of your lot and the number of vehicles you need to store. The type of container you get is more determined by your budget. Containers that are a little dinged and dented with a little rust will obviously be cheaper. If you’re not looking for a project or want a container that’s ready to go, try a one trip container. A one trip container was never part of a cargo operation. They’re in much better condition because they only made one trip — from China to the US.
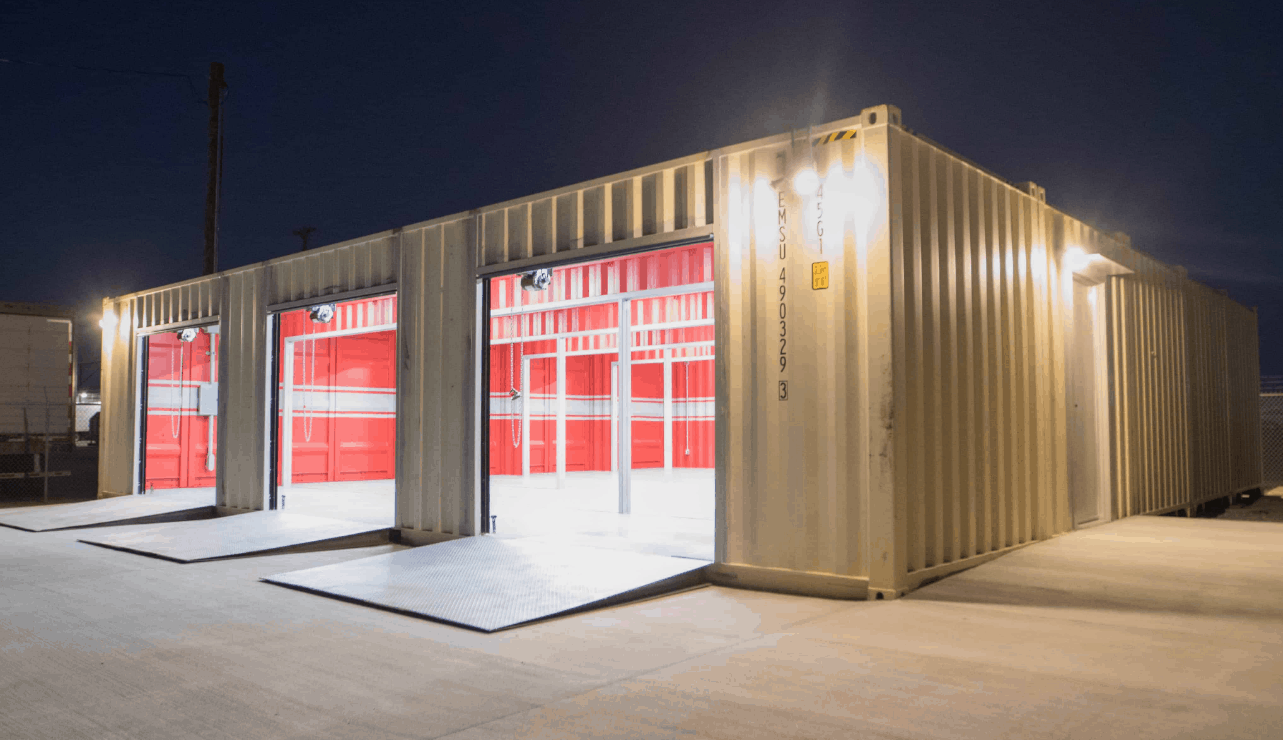
3. Shipping Container Garage Style
Another thing to consider when building a storage container garage: what style are you going to build? Here’s where you can be as creative as your budget and space allow you to be!
Here’s a few ideas to get you started:
- Got a compact car? One container might be enough for a neat and tidy one car garage.
- Place two containers on each side and put a roof between them. You’ll have plenty of space to store multiple cars plus storage on the side.
- Stack multiple containers like building blocks around your car storage space. You can create various workshops and storage from all of the containers.
Once you get started, you’ll realize how fun it is to build with shipping containers. Play around with your design until you get it exactly as you want it.
4. Prepare Your Land
Now that you know how you want your garage to look, it’s time to get down to the nitty-gritty. You can’t just drop a few containers and call it a day; there’s a process you have to follow.
First, reach out to your local government to see if you need any permits to build a container garage. You don’t want your project derailed by paperwork.
Once you’ve got the all clear, you have to prep your land. Here’s how:
- Measure and mark the area you want to use for your garage
- Clear the area of any plants and debris
- Lay a basic foundation, like a concrete slab or steel pipe footing foundation
Now you’re ready to bring in the containers and build your garage.
5. Container Garage Basics
Your foundation is laid, and you’re ready to place your containers. There are some basics to consider at this point of your build. First off, if you plan on parking your car in the container, it’s best to position it with the opening facing the driveway. If you’re using the containers for storage, consider pointing the openings towards your house so you can keep an eye on them. Second, if you chose a used container, you might have to do some upkeep. Painting, rust removal and prevention, taking care of dents and scrapes, etc. are all things to consider before you move in.
Containers are easy to build with and durable, so they won’t need much to get started. Just a little bit of work makes it all worth it.
6. Upgrade Your Shipping Container
Most home garages have basics build in that we don’t think about. With a shipping container, you have a bare canvas that you can make into whatever space you like.
Here are a few options to consider:
- Add insulation to your garage if you’re using your containers not just for your car but for storage too
- Add electrical drops if you want to use the container as a work space
- Consider air flow and add a few windows if you’re going to be doing projects inside the containers
These are basic upgrades that make a big difference. Think about how you’re using your space and what you need to be comfortable.
7. Beyond the Basics
You’ve got your container garage set up the way you want it. If you want to tinker even more, here are more ideas for ways to improve your dream garage:
- Add security, like cameras or motion detectors, especially if you keep expensive equipment in your garage
- A de-humidifier keeps dampness at bay and extends the life of your car and items in storage
- Install shelving and a work bench to make it your ultimate work-space
- Add windows to open up the space
- Lay down flooring or a ramp to make getting in and out easier
- Need more ventilation? Put in a fan
- If you change oil, paint, or need a place for runoff to flow, put a drain in the floor
With the money you save by using a shipping container to build your garage, you’ll be able to afford a lot of great upgrades!
Build More with Shipping Containers
Creating the shipping container garage of your dreams is easier and more affordable than ever before. Once you build your garage, you’ll start wondering what else you can do with shipping containers!
We’ve got tons of different containers to choose from and can help with modifications, too. Check out all of your shipping container modification options and build your dream garage today!
